
Imagine a different scale of art that requires a detailed eye and a steady hand. For centuries, many artists have crafted work in miniature form. From furniture to oil paintings, miniature art is work that is described to be no bigger than the palm of the hand. Recently, miniature art has found new popularity on social media. One artist from Provo, Utah has popularized miniature art through her replicas of famous museums and artwork. Mckay Lenker Bayer’s work has led to the Tiny Art movement. You can see her work @tinyartshow on Instagram and get inspiration for your own tiny art exhibit.
Materials
-Post-it notes of multiple sizes and colors. You can also use a full-size sheet of paper and cut it with scissors to any small size and shape that you want. The pieces of paper should not be larger than the palm of your hand.
-Markers, colored pencils, regular pencils, paint, crayons, pens, or chalk.
-Tape. Scotch, masking, or painters may be used to tape your pieces to the wall. You can also use magnets to hang the pictures on your refrigerator.
-Glue stick/glue
-Colored paper for frame
- (Optional) You can use glitter glue or small buttons on the outside of your frame for a little embellishment.

Directions
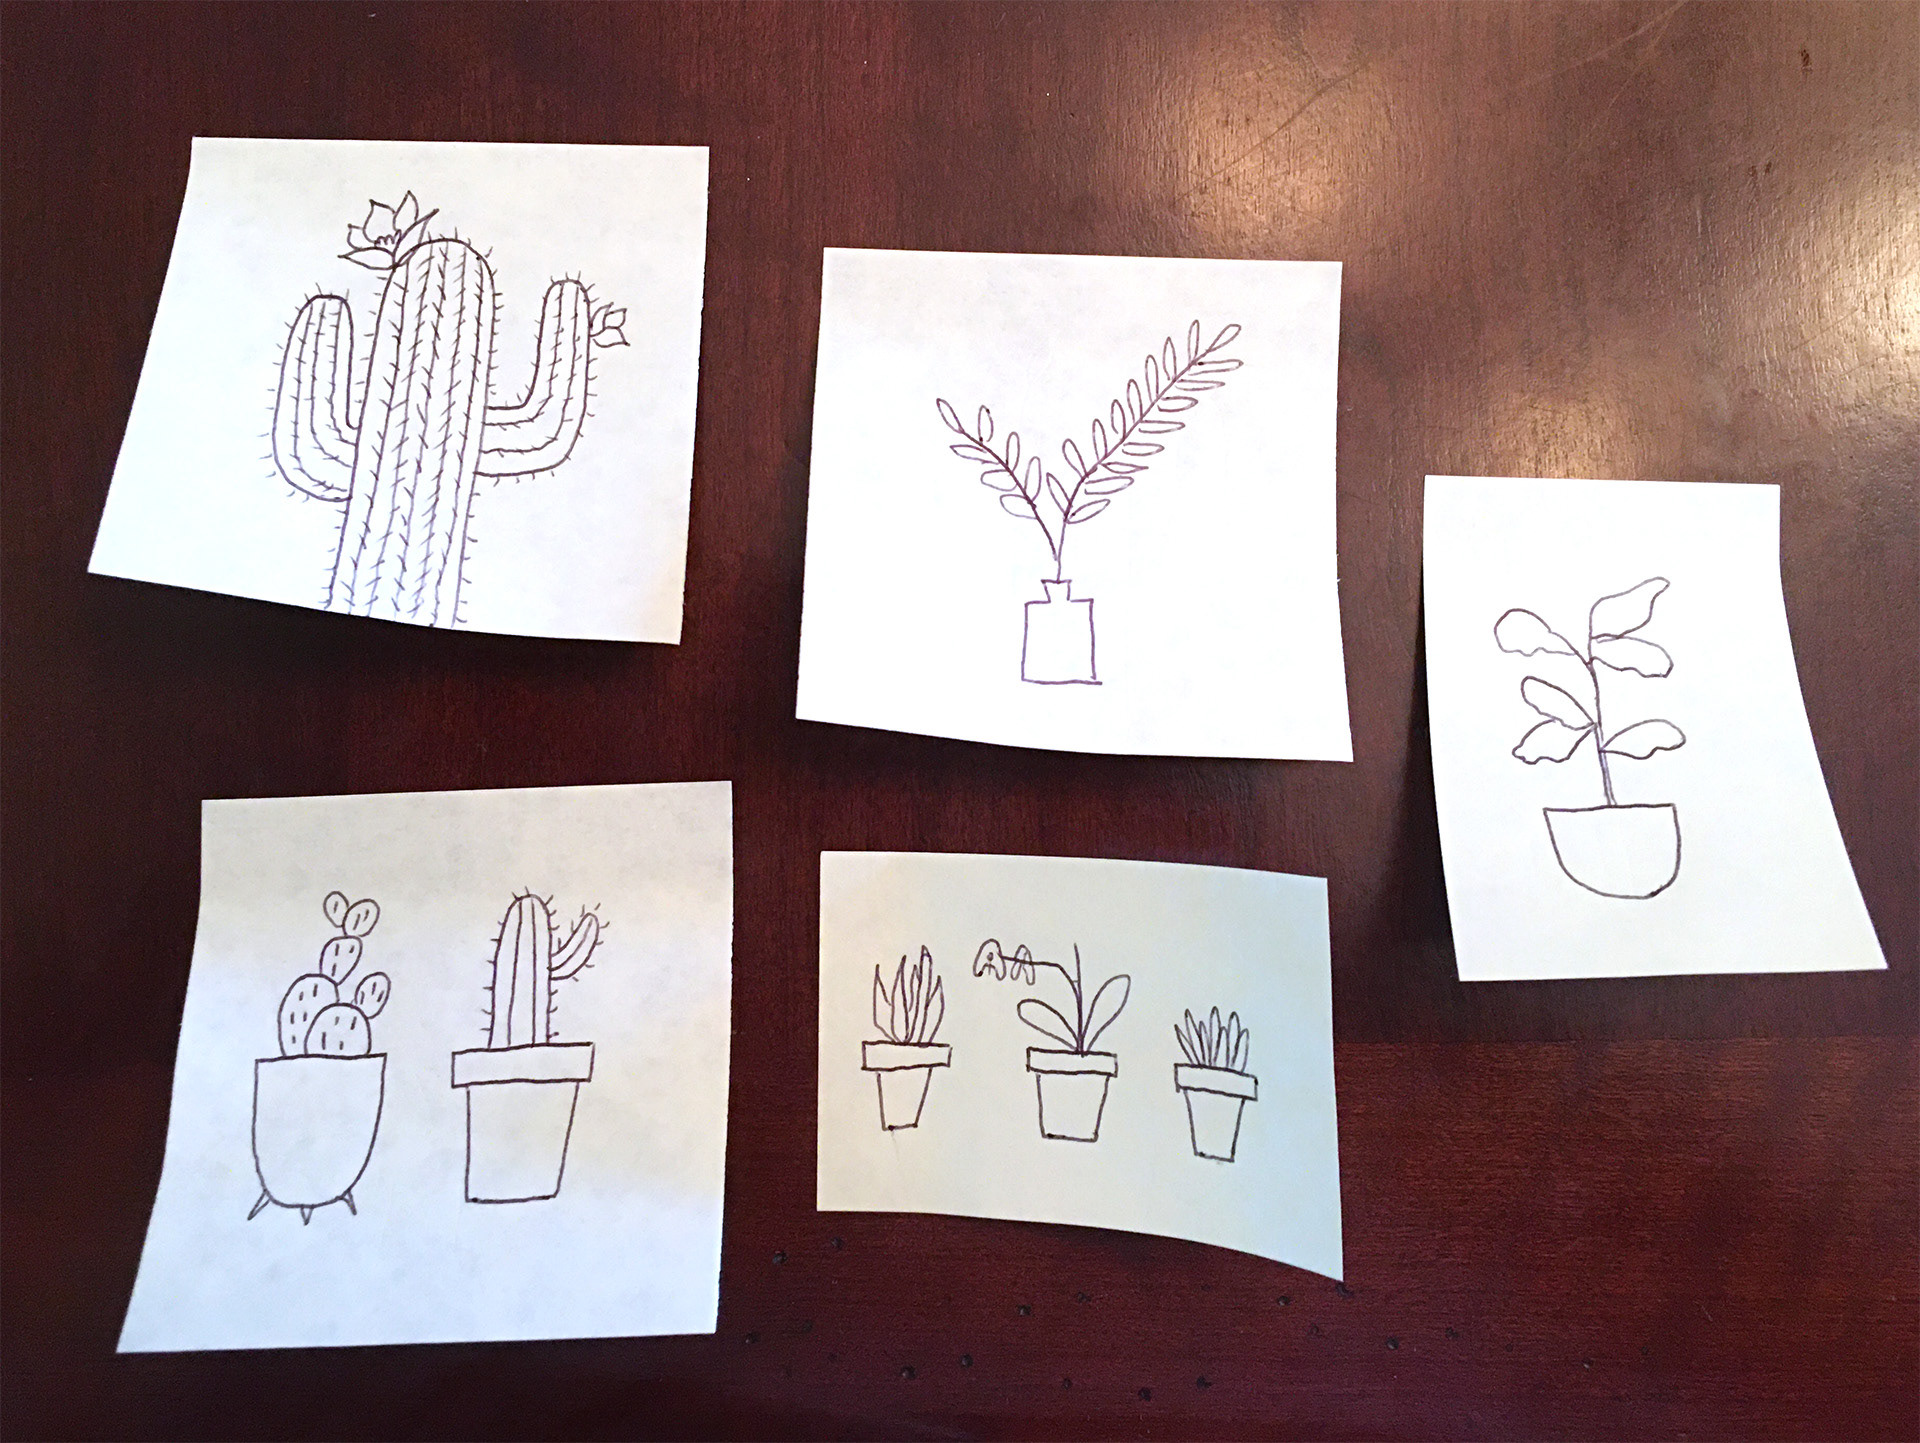
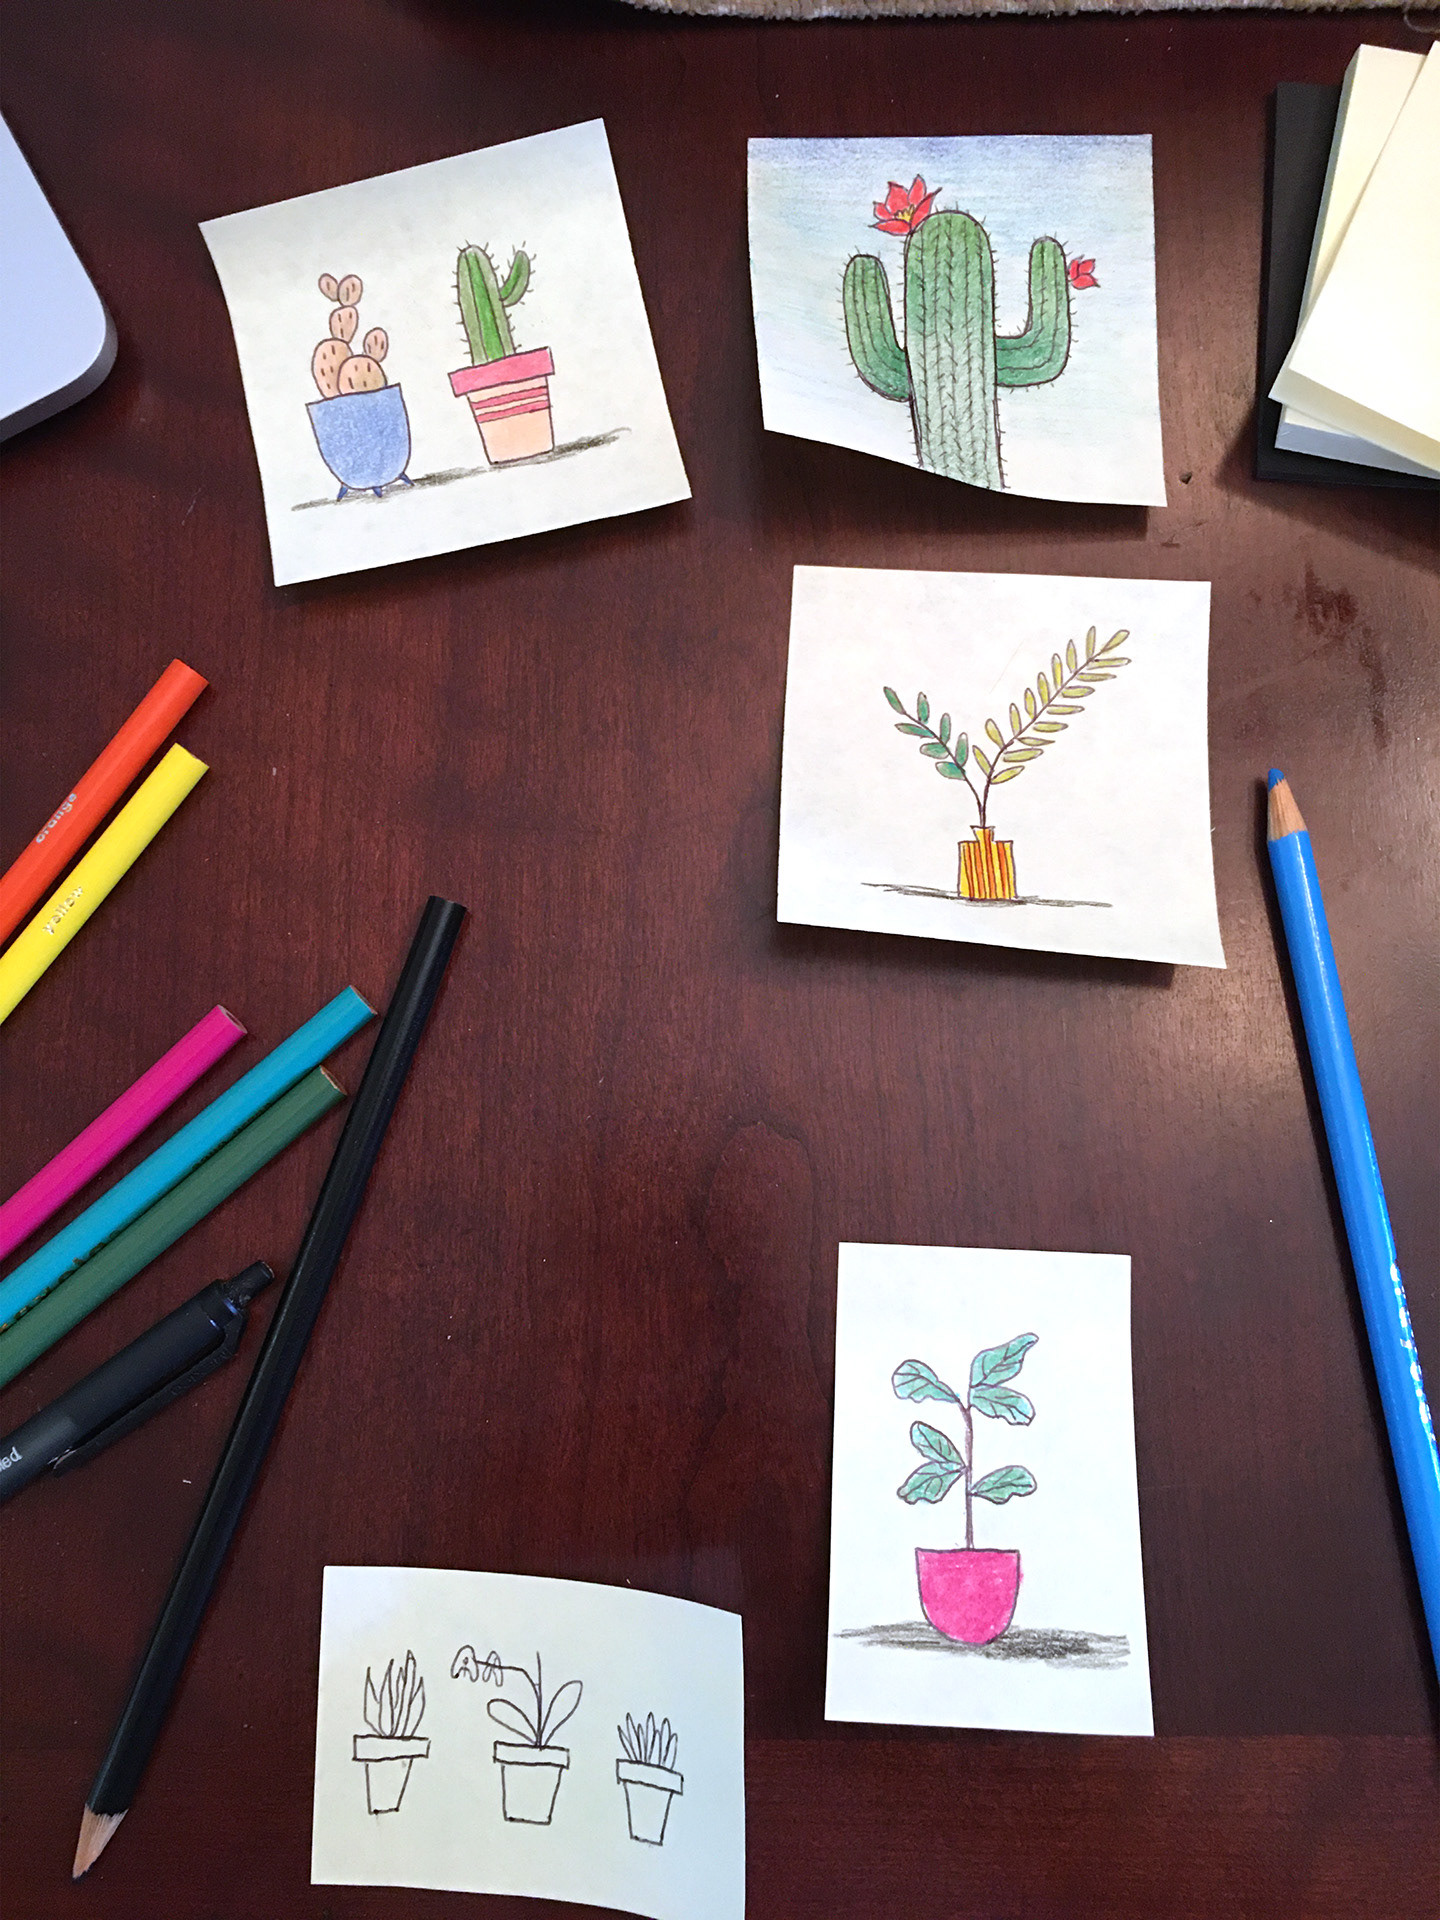
1. Decide on the theme of your artwork. The example below uses potted plants for inspiration.
2. Take your post-it notes or small pieces of paper that you have cut and draw a frame around the edges of the paper with your pencil. Leave enough room in the center of the paper to draw your picture. You can also use a separate piece of paper to make your frame. Design your frame and cut it out. You will later glue the frame to the paper you used to create your drawing. We used black construction paper to make our frame.
3. If you are using one piece of paper for the picture and the frame, color in the frame you drew with colored pencils, paint, crayons, markers, or chalk
4. Use a pencil to sketch your picture in the center of your paper.
5. Use colored pencils, paint, crayons, markers, or chalk to fill in your drawing.
6. If you created a separated frame, glue it to your picture by placing it on top of your paper. Decorate your frame with patterns, glitter glue, seeds, beads, pebbles, or other fun materials.

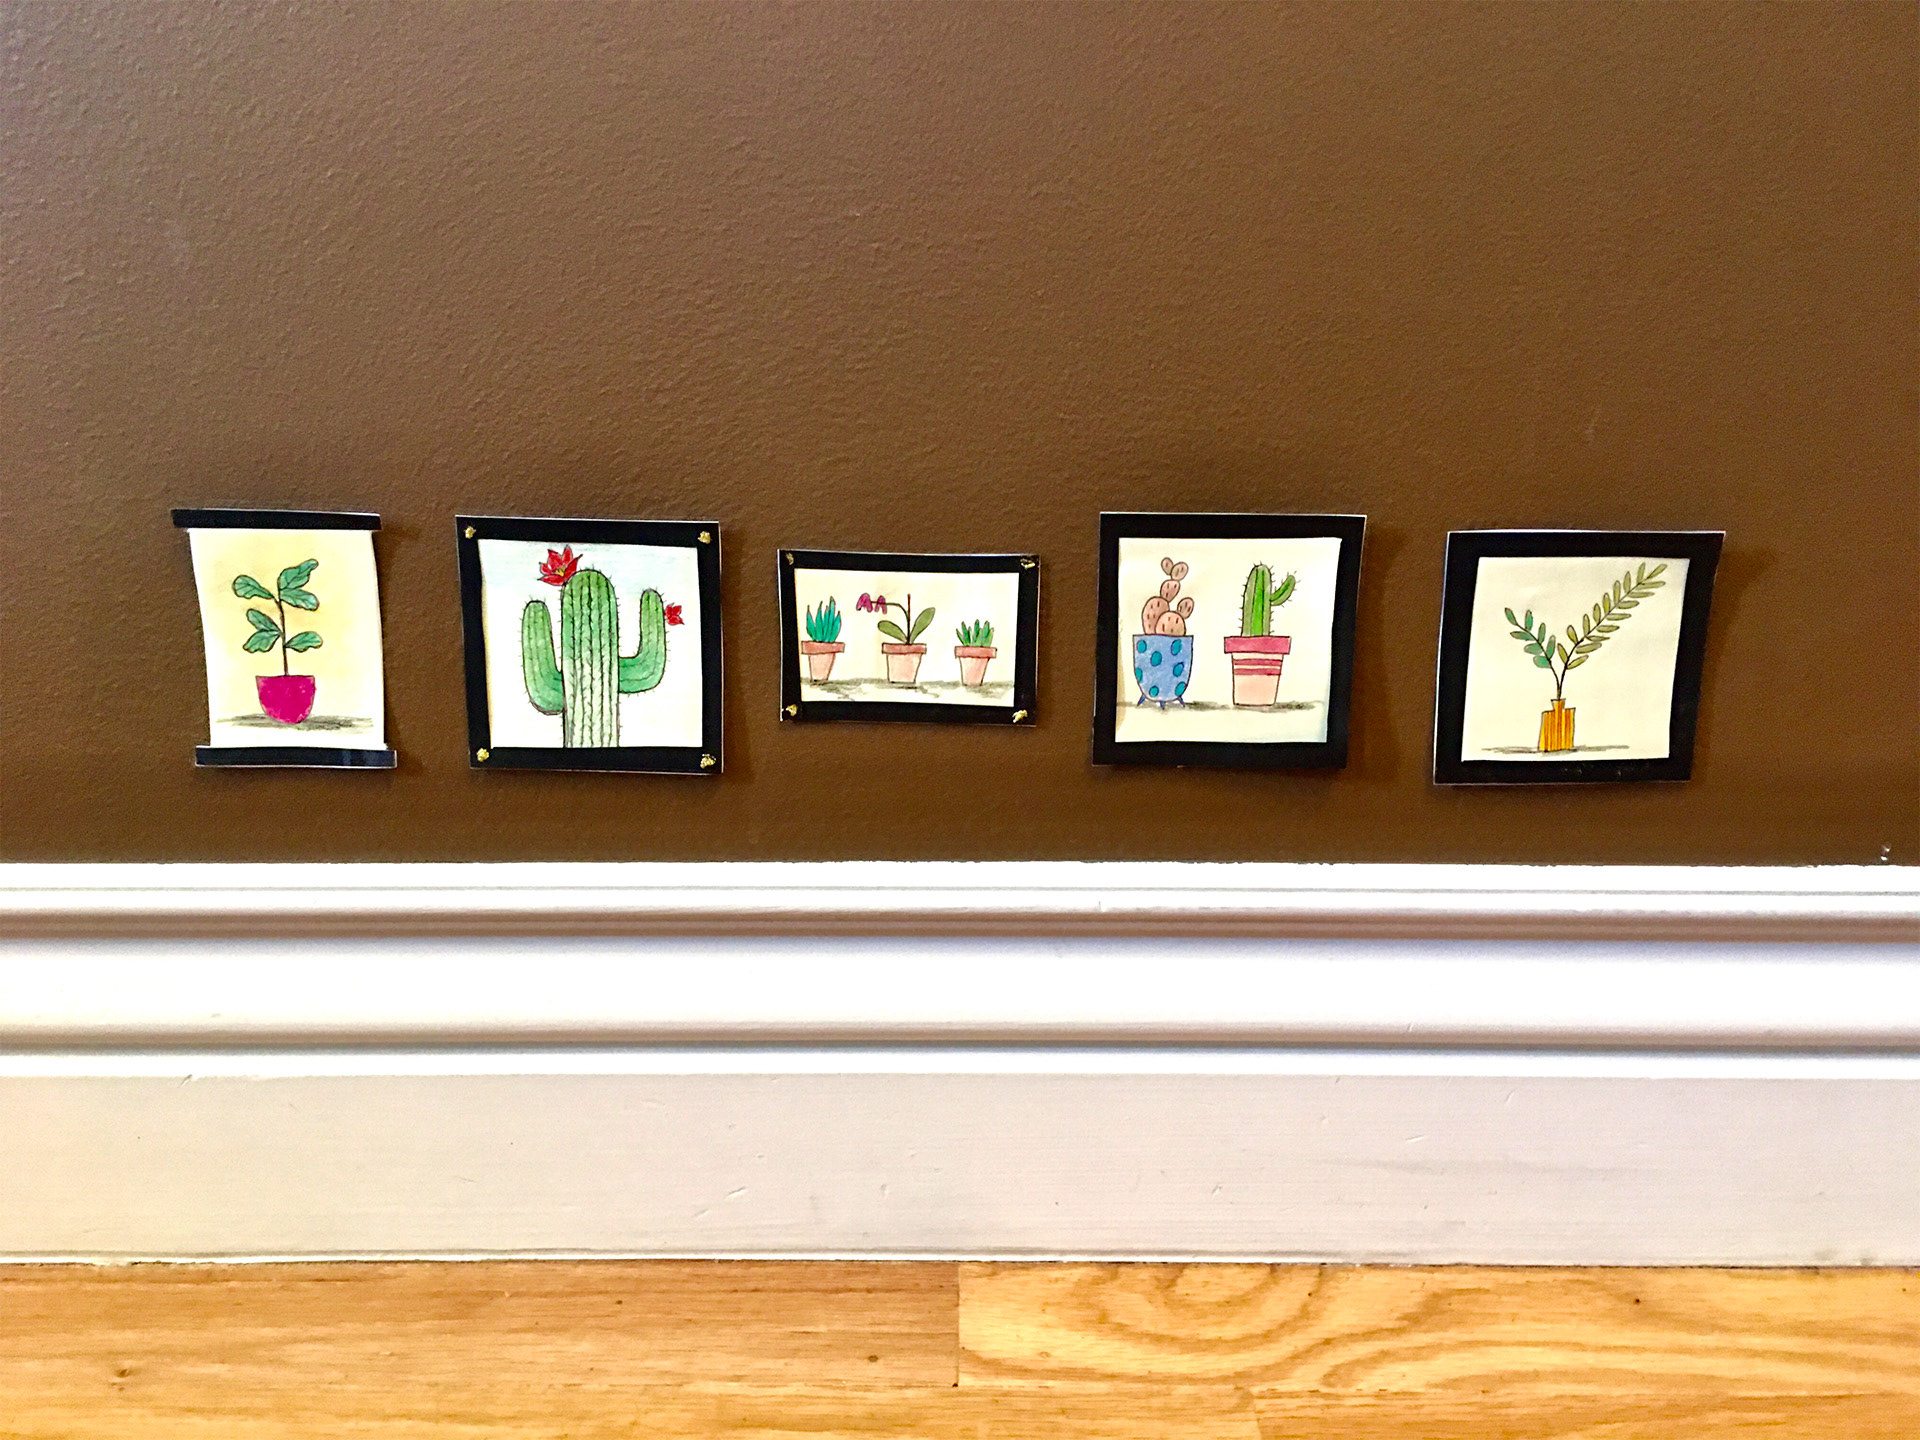
8. To create your miniature art exhibition, tape your framed picture to the wall. Remember to fold your tape on the back of your art so that it is not visible. Remember, this is a tiny art exhibit! Find a place on your wall near a baseboard to create your exhibit or use magnets to attach to a refrigerator or white board.
9. Take a step back and appreciate your art. You are the artist and curator of this exhibit! Think about why you came up with your idea and why you chose to display it the way you did. Get creative-what can you add to make your artwork look like a real museum?
10. Have your family come and see your tiny art exhibit and share your work with the museum on our social media with #wamcreateclub
Tip: Make sure you hang your artwork in a place where small children and pets can not find it!