
The month of October is a time for frightful fun and imagination! For this week's art project we want you to think of a terrifying or funny Halloween scene and a spooky monster or animal you want to bring to life. These are two simple projects that will help demonstrate the complexity of dimension in art. By using layers to create depth, you will be able to draw your viewers into the story you’re telling. For these instructions we will be showing you how to recreate our piece, but if you want to create your own idea, these principles still apply. In the materials and directions below, you will see what we used to create our example pieces, but, you are free to use any kind of materials you choose to achieve your vision.
Materials needed:
● Colored Construction Paper
● Pencil or Pen
● Scissors
● Glue Stick
● Sketch Paper
Materials needed:
● Colored Construction Paper
● Pencil or Pen
● Scissors
● Glue Stick
● Sketch Paper
Directions (for pumpkin scene):
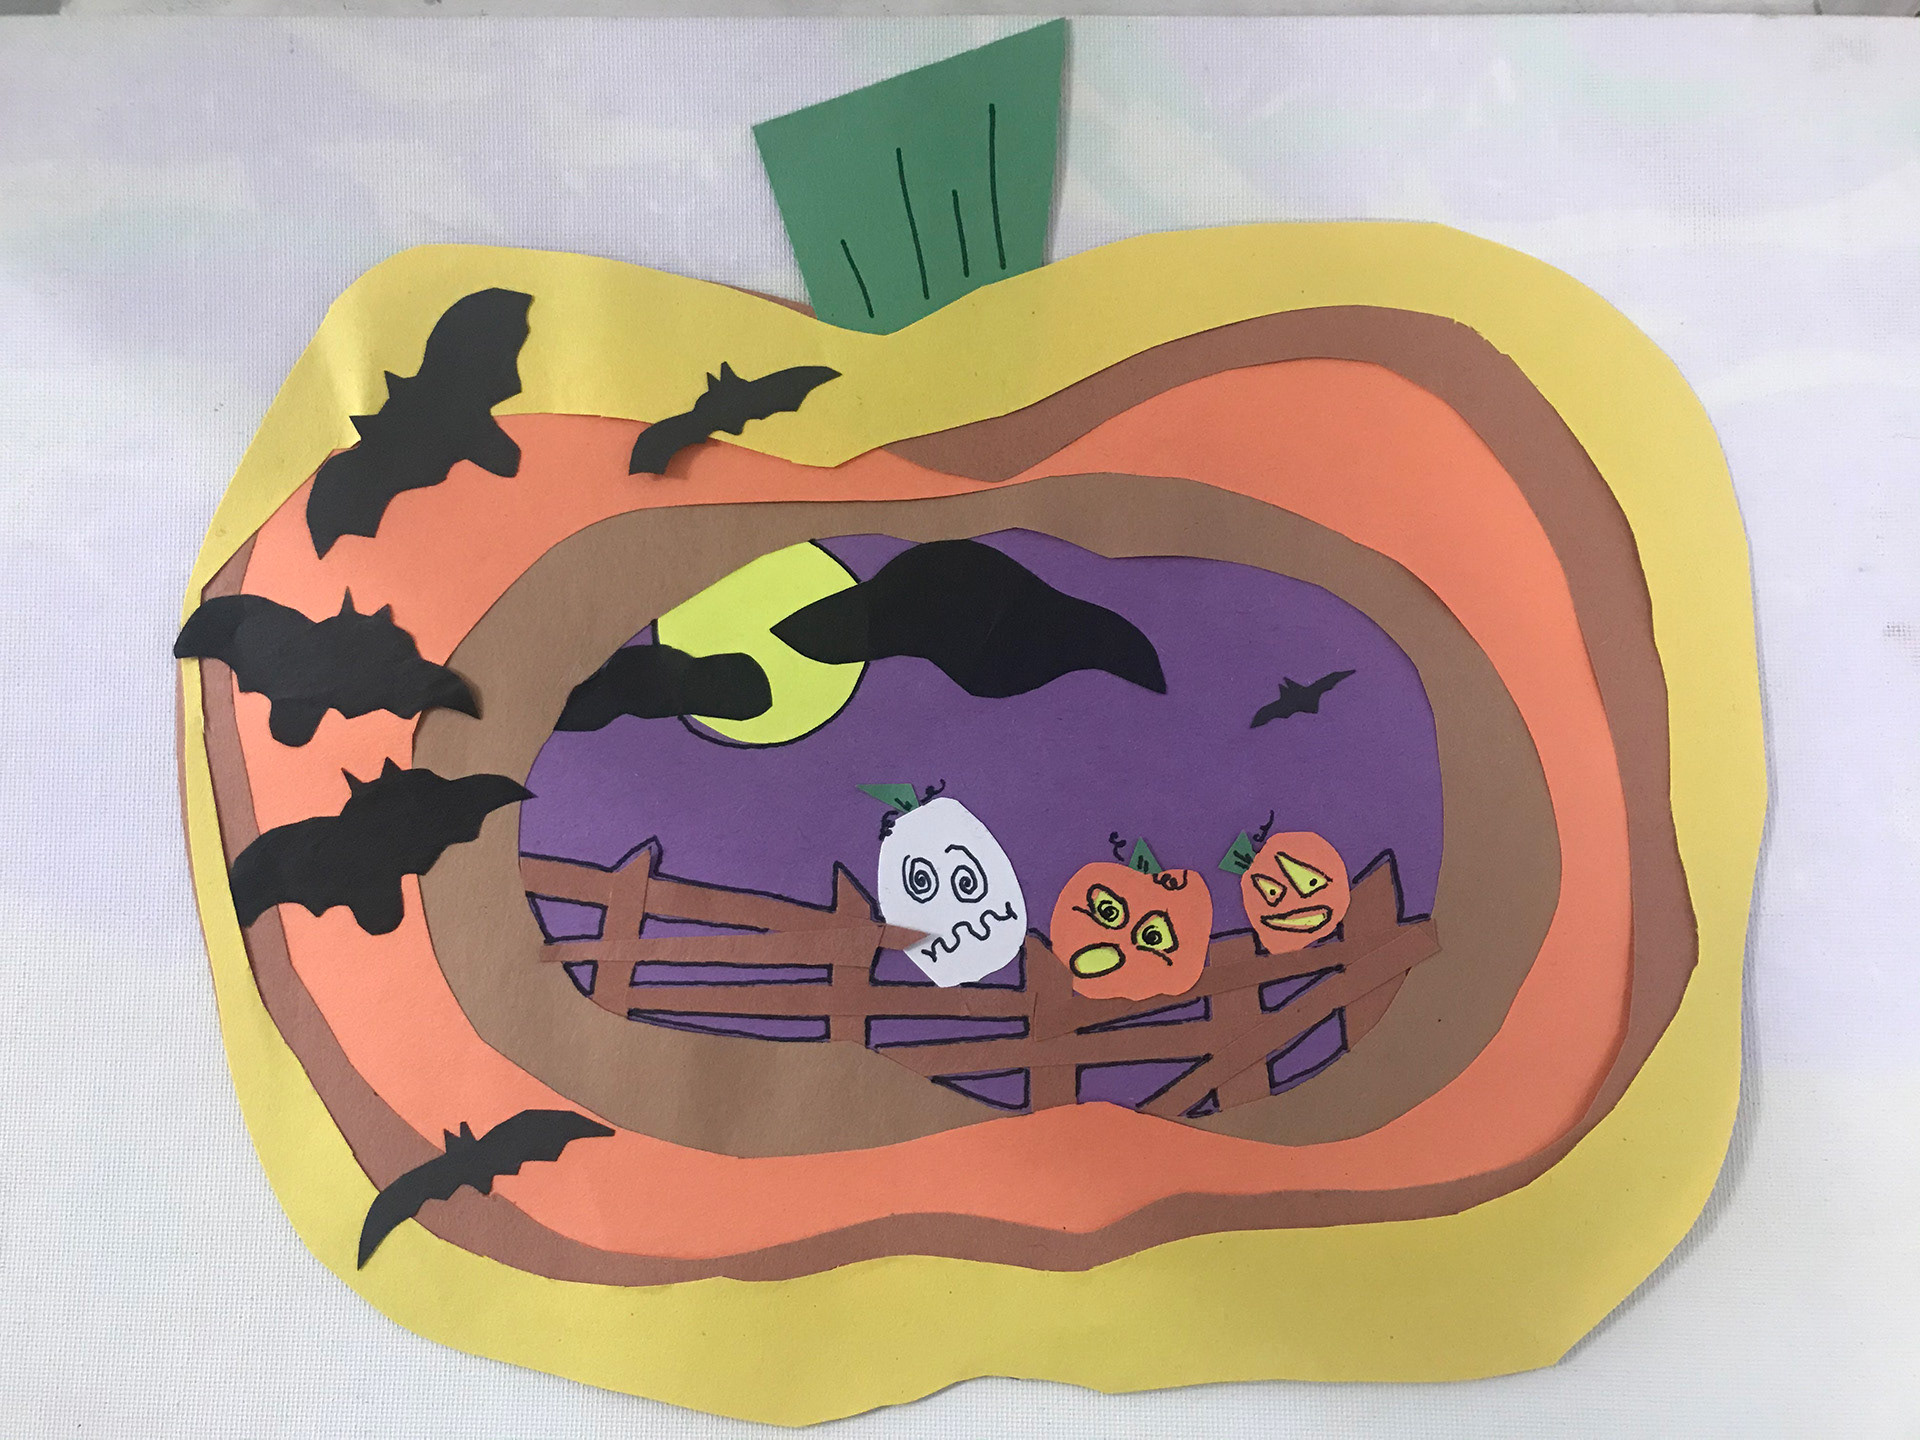
● Use sketch paper and a pencil to sketch out a Halloween scene you’ve envisioned. Our example scene depicts three pumpkin friends hanging out together on a fence in the light of a full moon. All of this is framed inside a layered pumpkin with the friends at the center.
● Take a piece of colored paper (any color you want) and use a pen or pencil to make wavy lines of varying thickness in the shape of a big pumpkin. This is going to be the pumpkin frame. Start from the outside and work your way in going from big to small.
● Once you’ve drawn the lines, cut them out and use the glue stick to glue them onto another whole sheet of colored paper, layering your lines from small to large this time. There should be an open space in the center where the background paper shows. This is where the scene will be taking place
● Take a piece of green paper and draw with a pen or pencil a stem for the pumpkin and cut it out.
● Draw on a piece of colored paper bats, a moon, dark clouds, rectangles to make a fence, and pumpkins. Cut them out.
● Take the rectangles and glue them in the middle of the pumpkin frame to make a fence.
● Glue the pumpkins on the fence and draw some faces on them.
● Glue the moon, clouds, and bats.

Directions (for Halloween cat):
1 - Draw with a pencil or pen thick black lines layering from large to small, working from the outside in, in the general shape of a black cat.
2 - Cut out the thick black lines and glue them with the glue stick to a white piece of paper
3 - On a pink piece of colored paper, draw and cut out the center of the ears, nose and tail.
4 - With a black piece of colored paper draw and cut out eyes, whiskers, mouth and ears.
5 - Take a piece of yellow paper and cut out the center of the cat's eyes.
6 - Glue the cat face in the middle of the paper with the ears on top and tail at the bottom
This project is fun to create, so get inspired, be creative, and have fun!