
Berlin-based artist Björn Braun (b. 1979) is a minimalist artist who transforms found objects from nature, such as feathers, sticks, rocks, and nests into works sculpture. Look at his work online for inspiration for this project.
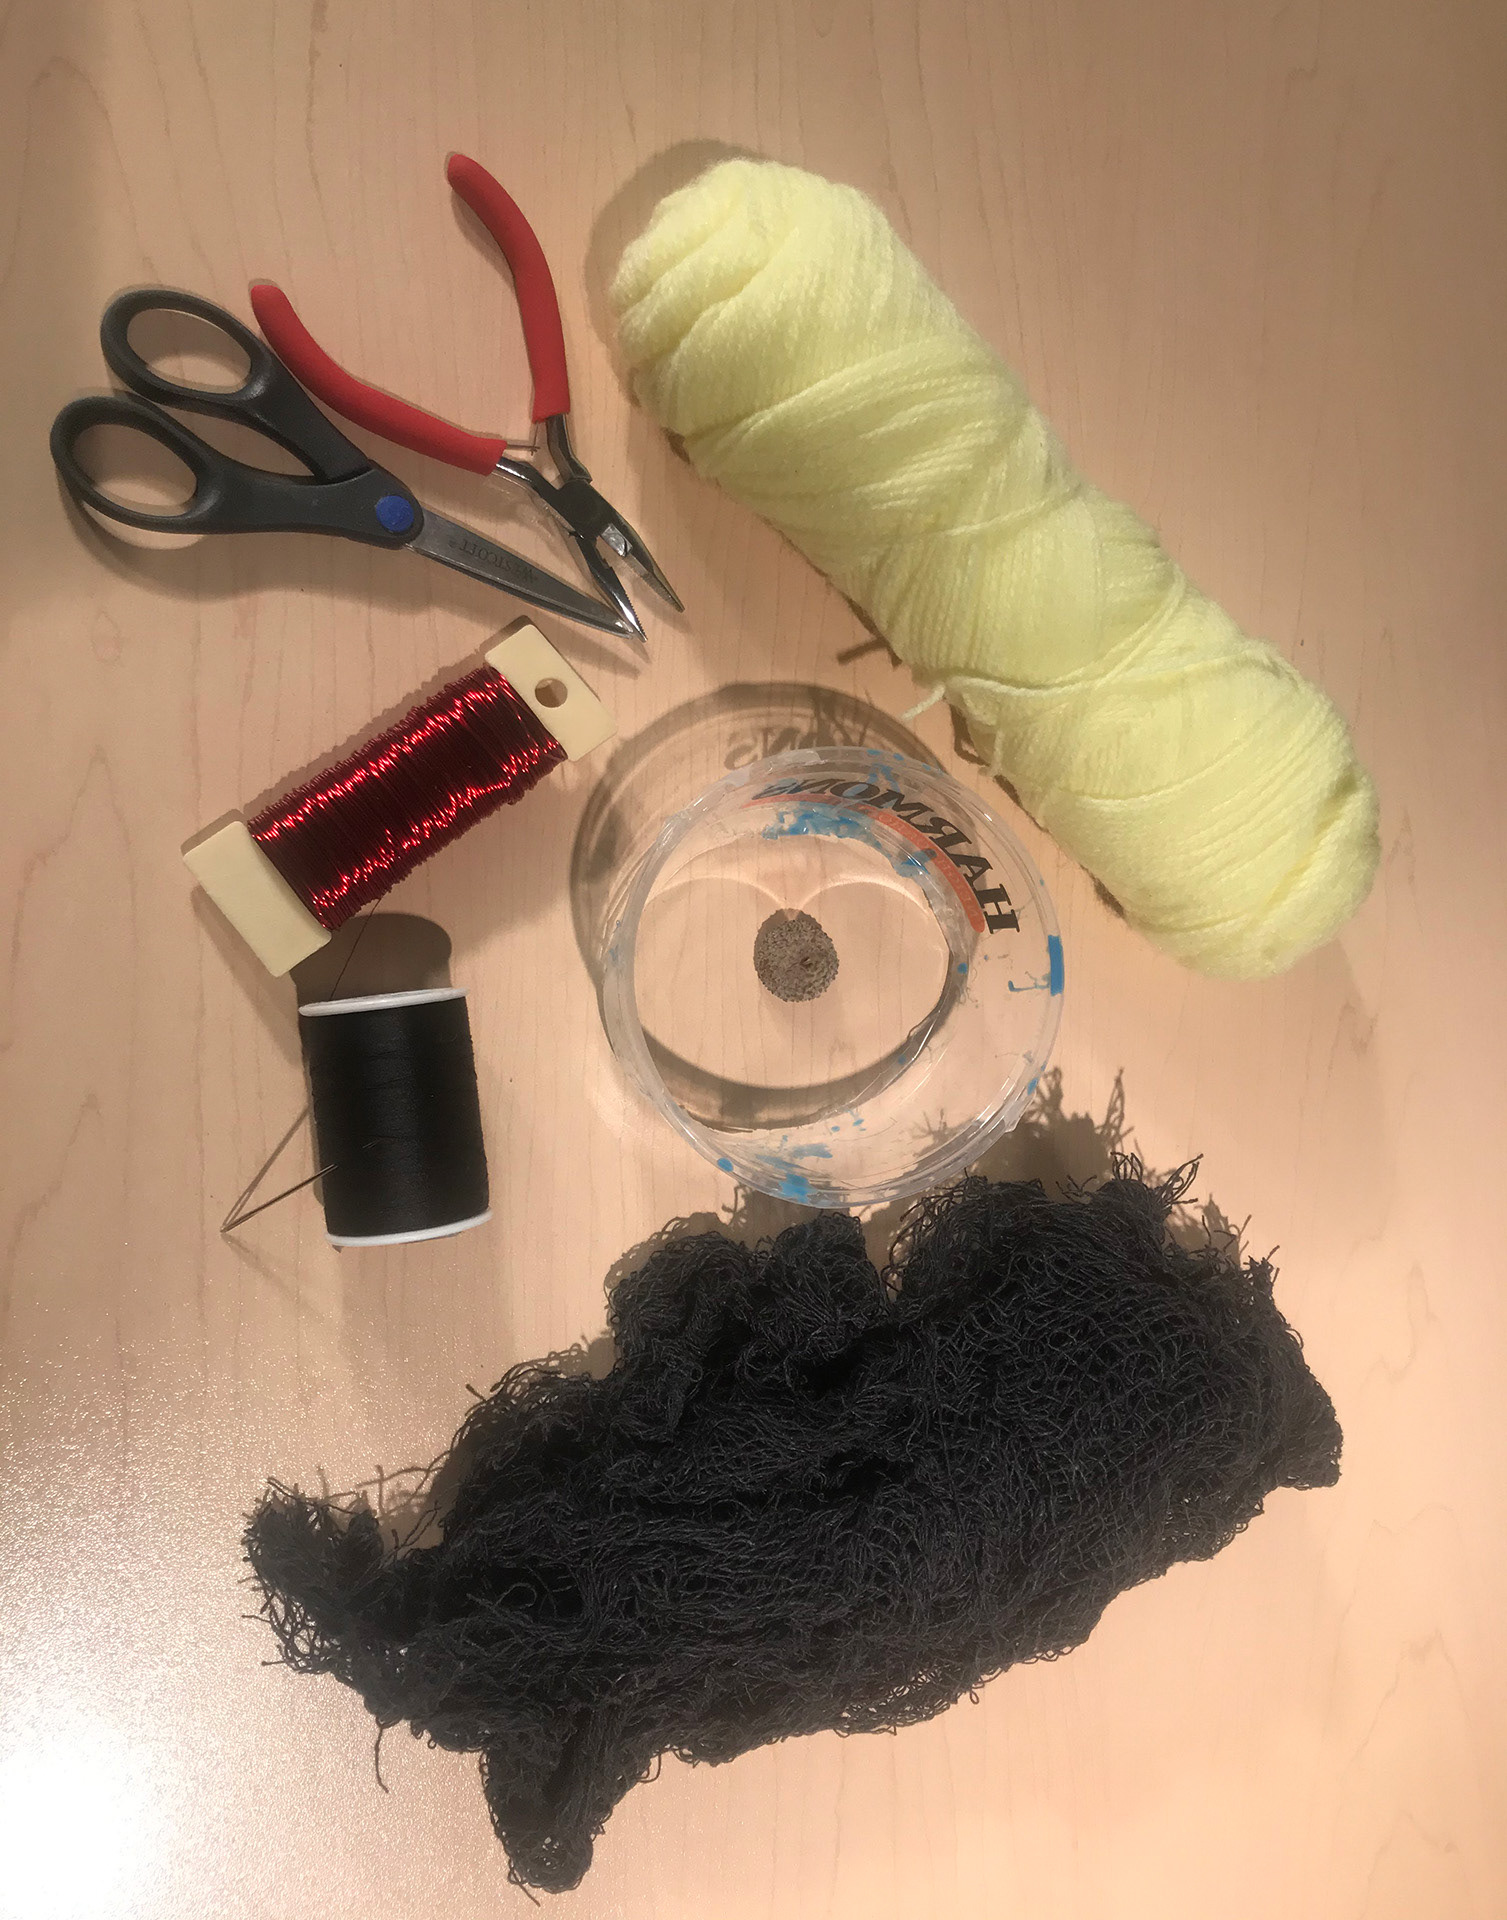
Materials Used In Our Example:
● Cheesecloth (any color)
● 24 GA. Wire (any color)
● Scissors
● Plastic or paper cup
● Needle and thread
● Yarn (any color)
● Wire cutters
● Needle-nose pliers
● An object that resembles the shape of a bird’s egg (a nut, a small ball, tin foil balls, etc.). These objects will become the base to wrap your yarn around to form the eggs for your nest.
Directions for the Cheesecloth Nest:
1 - Take a plastic or styrofoam cup, measure two inches from the top, and cut off the top from the point you measured. You should be left with a ring that is two inches tall.
2 - Take your cheesecloth and cut it into strips.
3 - Use the strips of cheesecloth to wrap the piece of the cup you cut out. You want to maintain the ring shape when doing this, so you are just going to be feeding the strips through the hole, around, and back. Tuck in the strands of cheesecloth to keep them in place. If you need help with the wrapping technique, feel free to check out the video for this project.
4 - Now, cut a circle out of cheesecloth to cover the hole at the bottom of the cup..
5 - Turn the piece upside down on the table. Place the circle of cheesecloth on top.
6 - Take your needle and thread and sew the circle to the strands that are wrapped on the cup. If you feel like you need more material on the bottom, you can cut another circle of cheesecloth and sew it on. You can repeat that as many times as you need to.
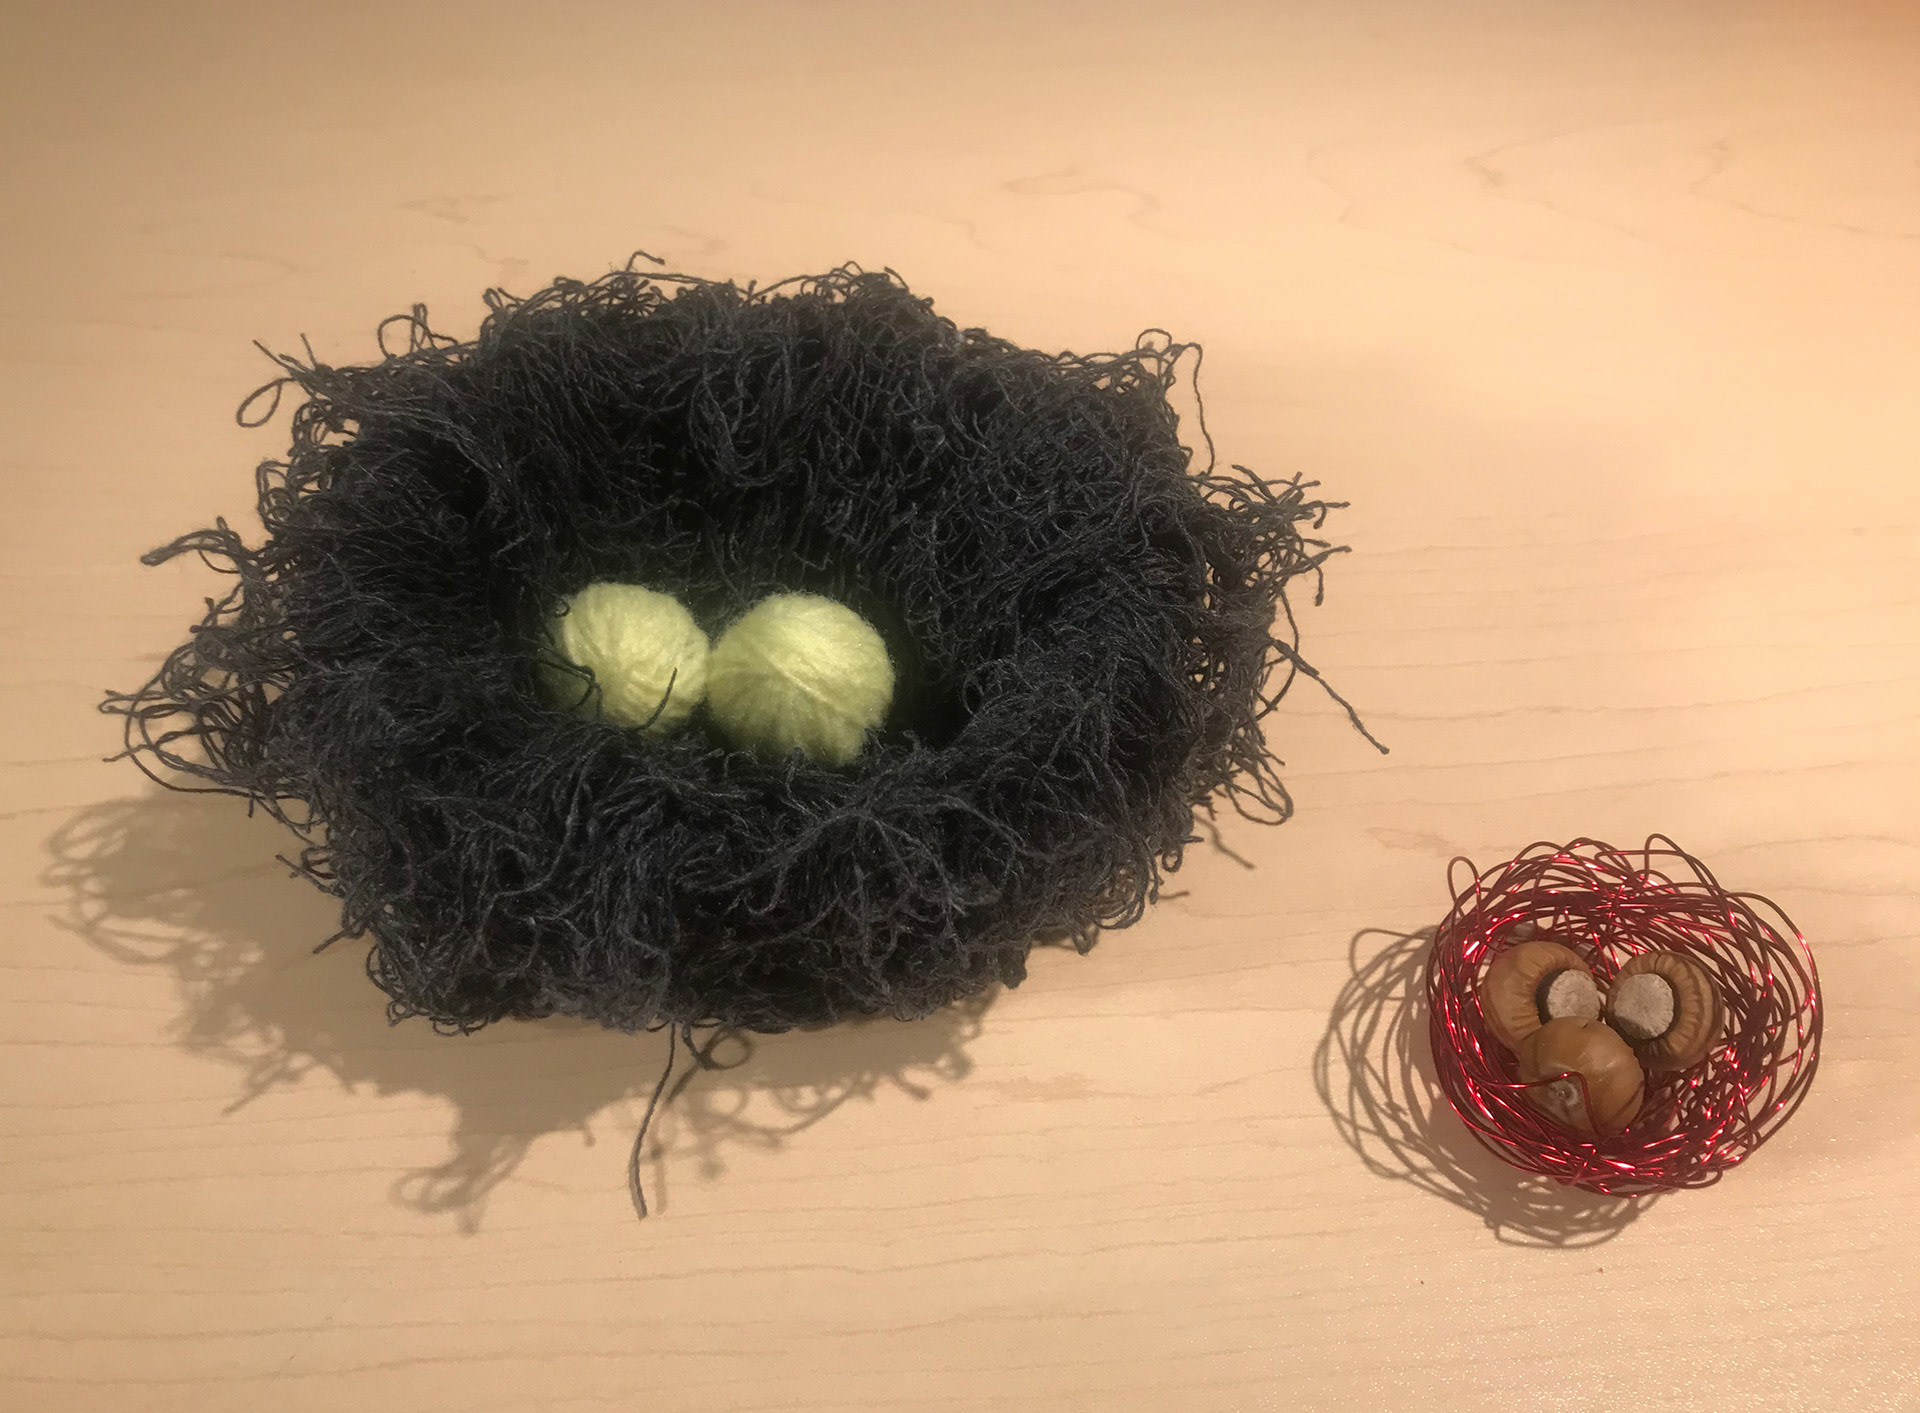
7 - Voila! The nest is done!
Alternative: You can try attaching the cheesecloth with hot glue or simply by wrapping and tucking in your strips of cloth.
Directions for the Eggs:
1 - Take the object you chose as the base for the eggs.
2 - Take whatever color yarn you have and start wrapping the object.
3 - When you’ve wrapped the object as enough to cover it completely, simply cut the ball of yarn free from your object, leaving a little tail or strand behind.
4 - Take the little tail or strand and tuck it into the other strands of yarn you wrapped around your object. You could also tie it off, creating a knot that will hold the yarn together. You can use a dot of glue to help hold the yarn in place.
5 - Now you have eggs and a nest!
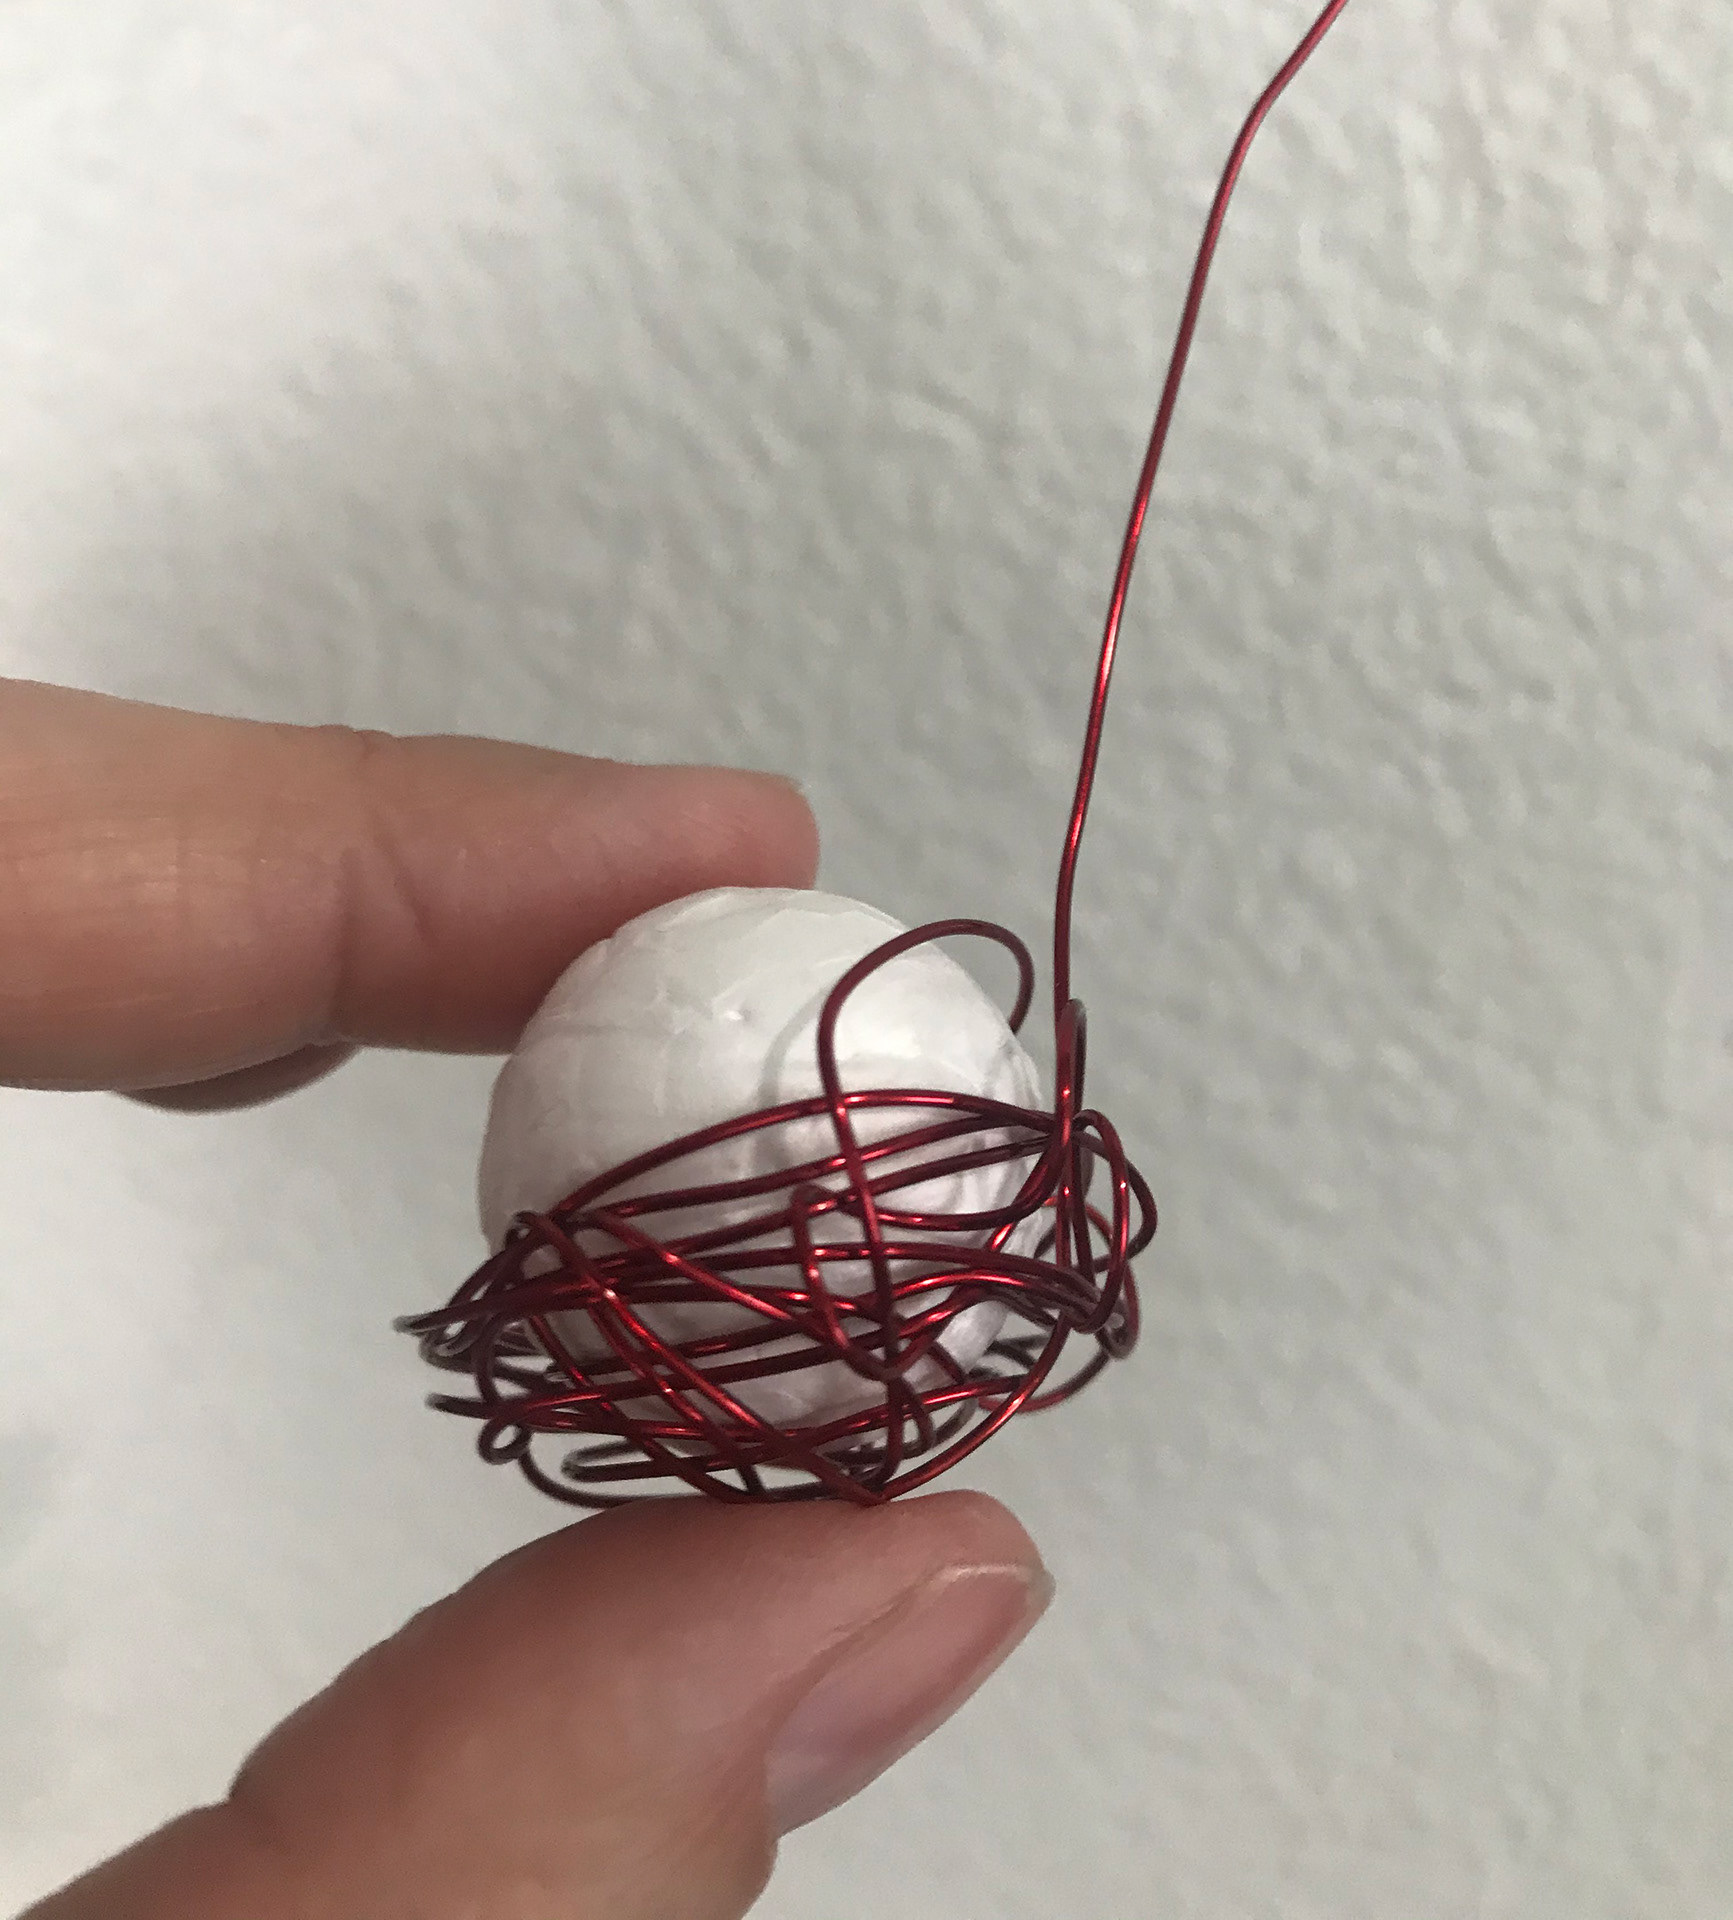

Directions for a Wire Nest:
1 - To create your wire nest, take a foam ball any size you want and wrap the 24 GA. wire around the bottom half of the ball.
2 - When you’ve finished wrapping, cut the wire and remove the ball. You should be left with a basic nest shape.
3 - Now, take some more of your wire and weave it through the nest to create some texture and thickness. Be creative in this process to make the nest truly unique.
4 - When you're finished with this, cut the wire again and tuck the loose piece you’re left with into the nest.
Alternative: You can add feathers, twigs or anything you like to your nests and eggs. You can also use the base of a mason jar or wrap cardboard in the shape of a ring to make your nest.
Remember, you’re the artist here! Get inspired, be creative, and, most importantly, have fun!