
Throughout time, Artists have used a wide-range of techniques for transferring images from one surface to another. Some of these techniques, including the grid system, assist artists in copying designs at a new scale. A grid is a network of lines that cross each other to divide a surface into squares. Artists use grids drawn over an original study (painting or drawing), in order to copy a work or to recreate it at a different scale on a new surface. During the 15th century, artist Albrecht Durer designed and used a drawing tool (a grid machine), to make a template that allowed him to accurately proportion is work (see image). Durer’s tool was made out of wood and built in a square frame, with vertical and horizontal threads that stretched across it to form a grid. The grid was placed so that light would shine through the window and through the grid, casting the grid’s shadow on to paper. The artist then traced those shadows to make his art.
Learn More: Look online to find other artists who are known for using a grid system in their work.
Materials you will need:
● Yarn or string
● Tape (painters or masking)
● Measuring tape
● White paper
● Colored construction paper or white paper
● Pencils, markers, crayons, colored pencils, or chalk.
Alternatives: If you don’t have wall space for this project, you can place your paper and yarn on the floor, a table, or any other hard surface. Outside fence walls work great too, you can use painters tape to make a grid and use washable chalk instead of pencils or markers. Channel your inner-artist and be as creative and resourceful as possible!
Directions:
Tip: If you don’t have colored construction paper, you can use white paper.
Tip for working with tape: if you don’t want your tape to show, try folding it over on itself (sticky side out) to make it double-sided and placing it on the back of the paper. This isn’t necessary for your string or yarn though.
1- Use your measuring tape to decide how high you want your grid to be on the wall. We made a grid with eight squares. Each square is represented by a piece of paper. To get started, make a small mark or line line with a pencil to help you visualize where you will place your first sheet of paper on the wall.
2-Tape your first piece of paper to the wall where you have made your mark.
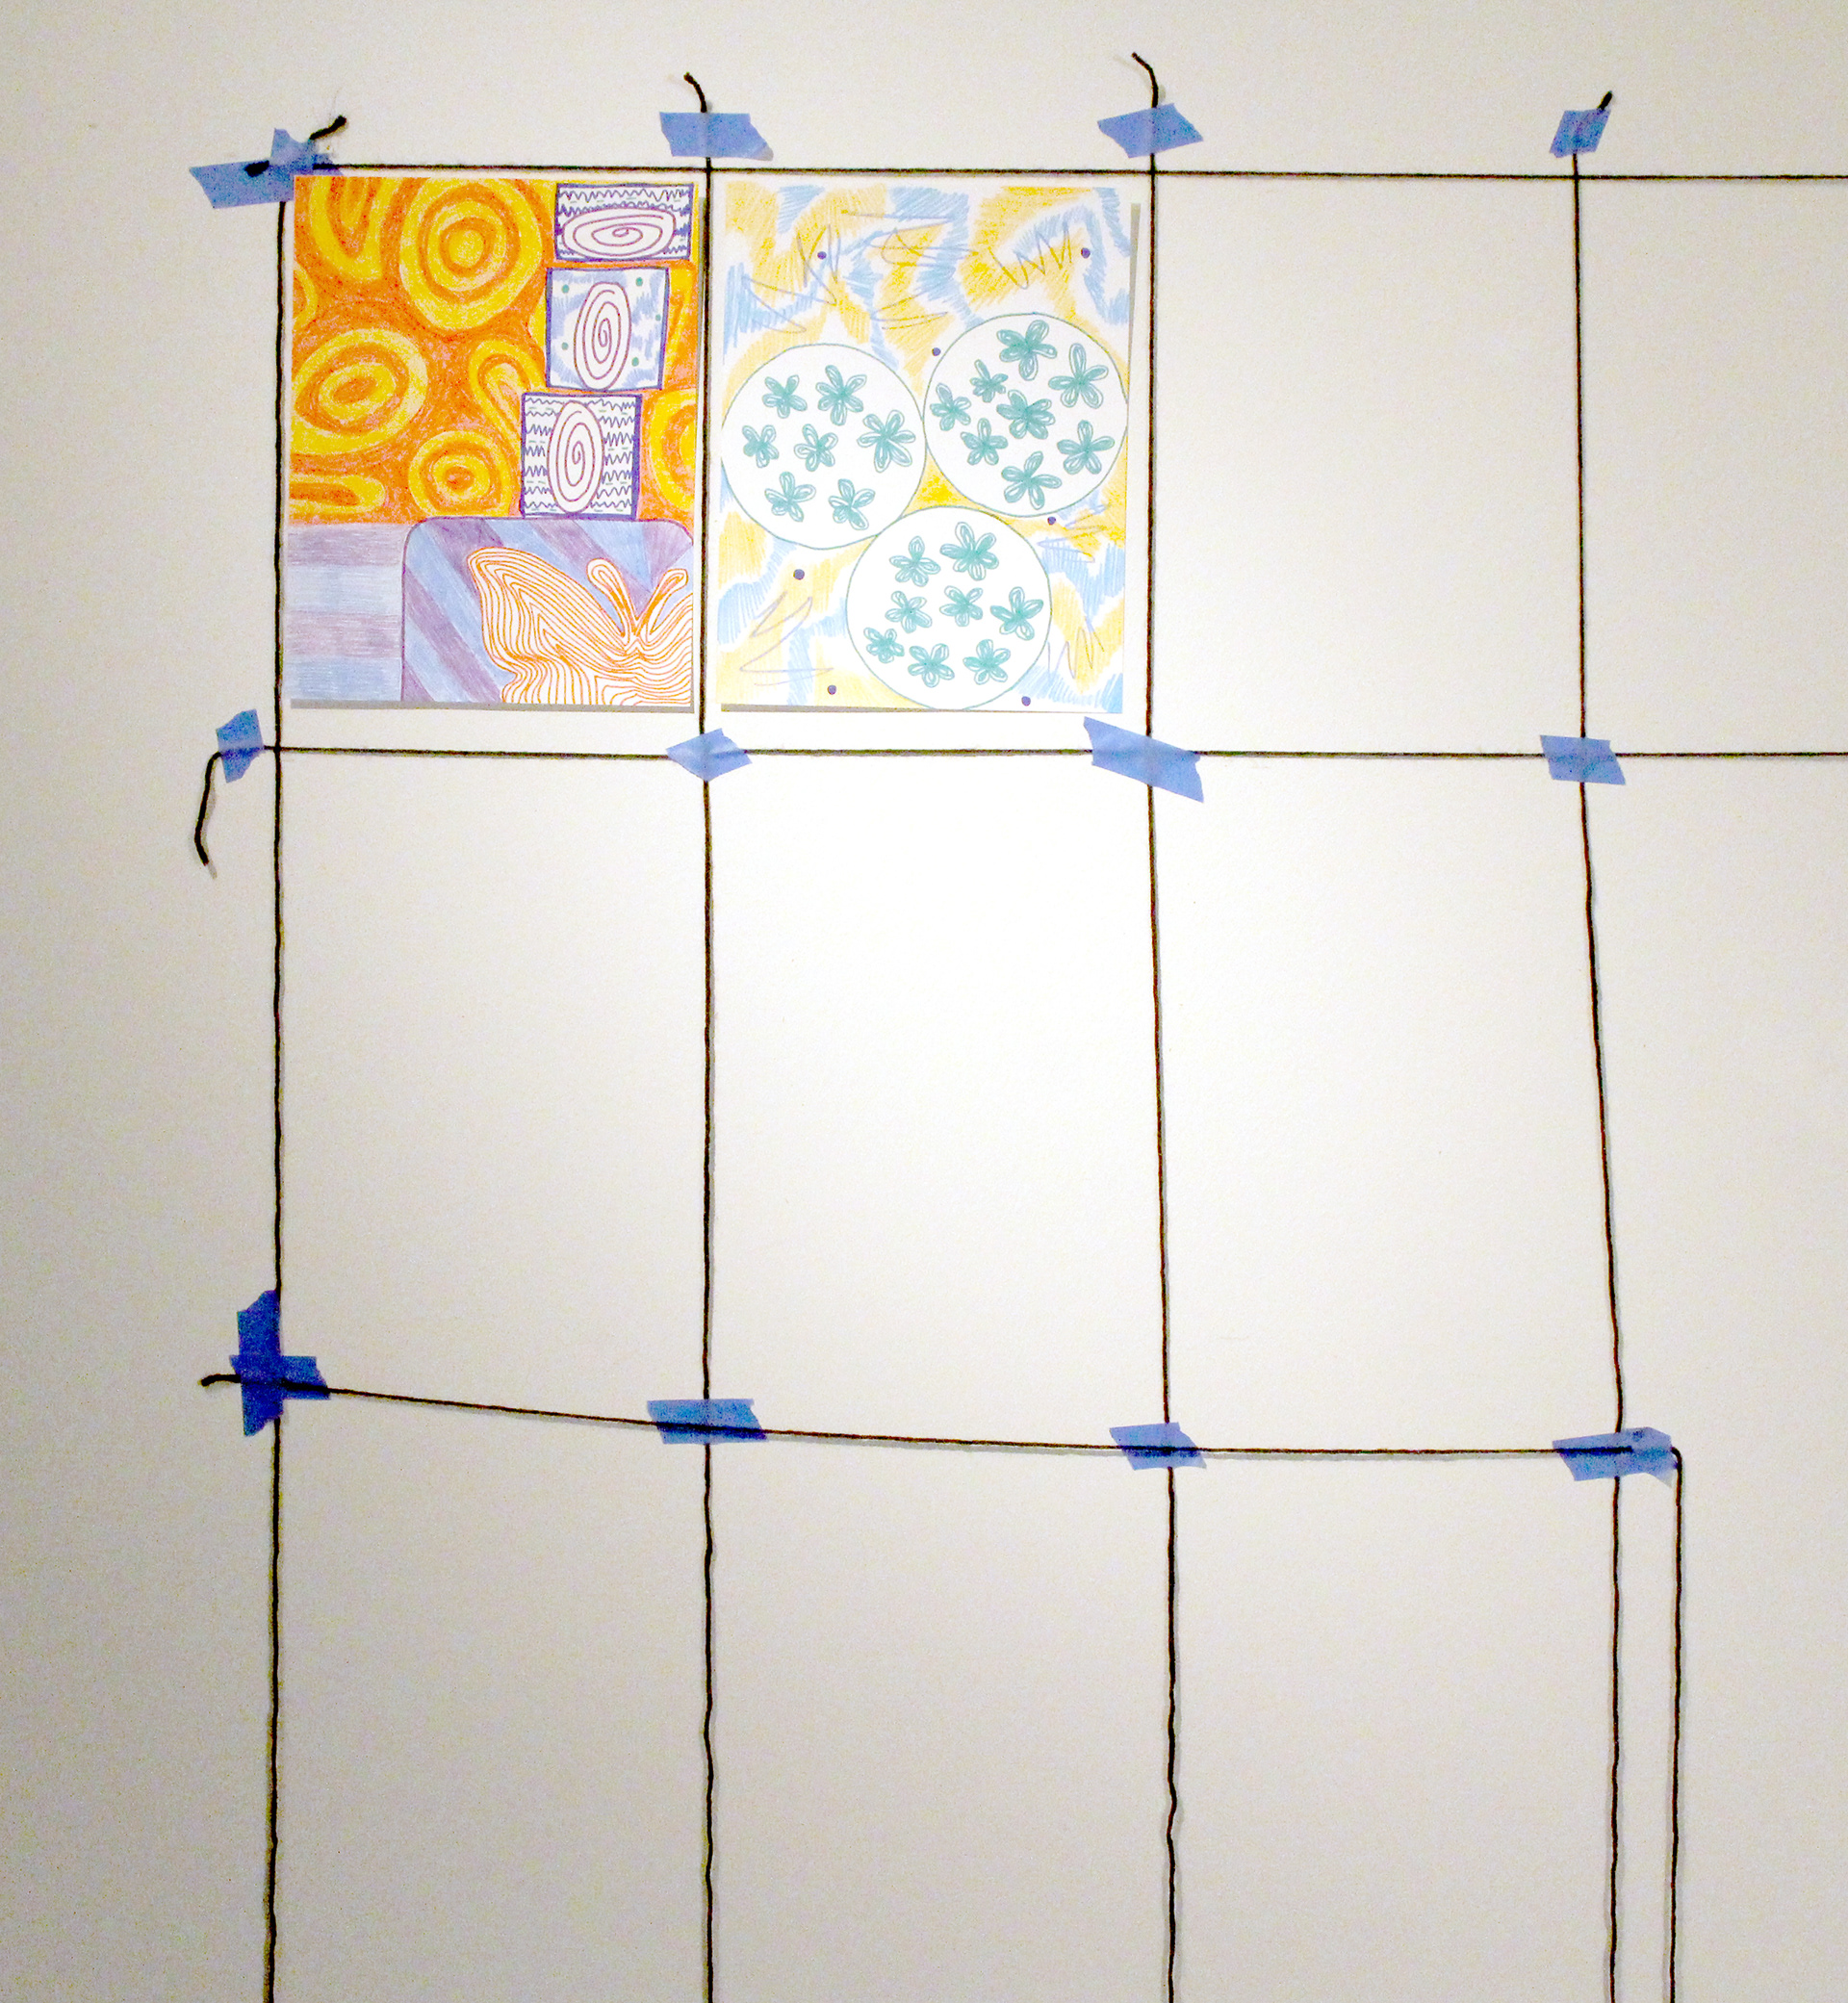
3-Use yarn to make your grid. Starting with the top row, cut the appropriate length of yarn and tape the yarn to the wall. Continue to alternate placing yarn and paper until your grid is complete (see video and photo).
4-Once the grid is completed, remove the paper, so that only the yarn is remaining on the wall. (See photo).
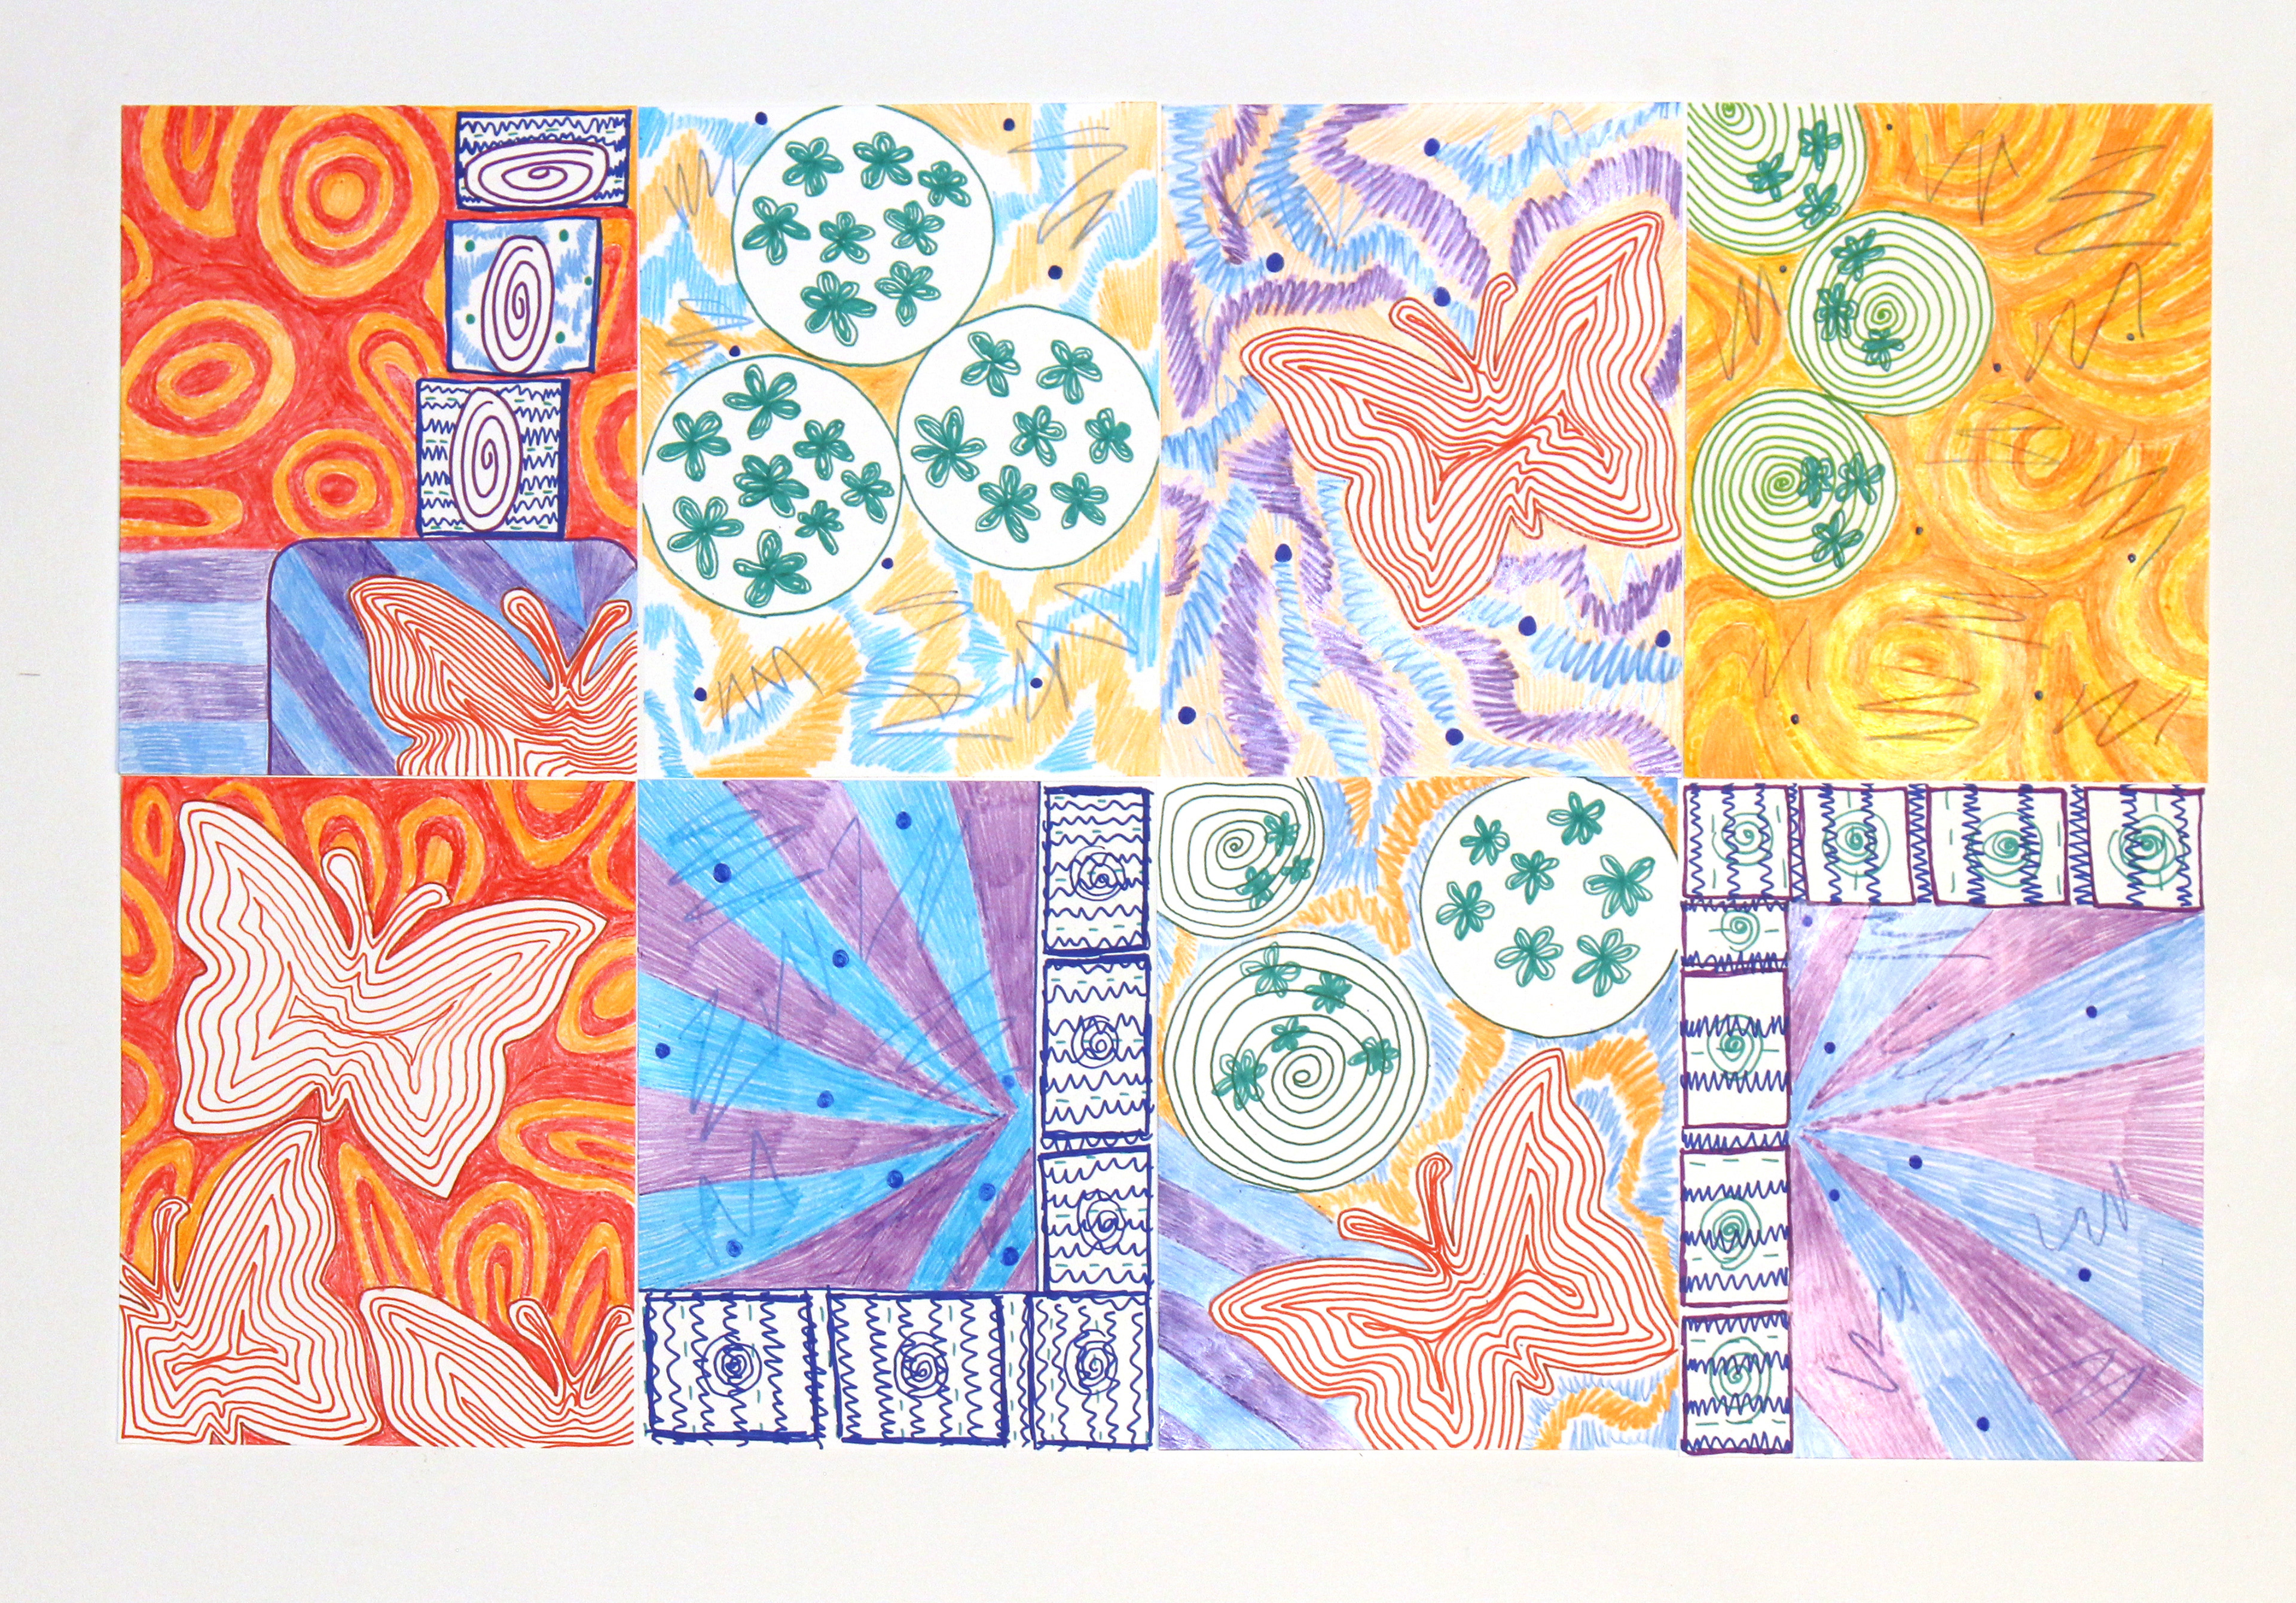
5- Design artwork for each of your eight pieces of paper. You can draw shapes, patterns, or animals, it’s up to you! We chose butterflies, rectangles, circles, and zig zags. We also chose to use the colors orange, yellow, red, purple, blue, and green.
6- Number your papers on the back 1-8 and then mix them up so they are not in order.
7-When you are done, gather the papers. In any order, tape the paper back on the wall so that you fill the eight spaces of the grid.
8-What does your mural look like?
9-This is fun project to do with family.
10-Finally, take a picture and send it in to us, we would love to see what you’ve created!